Nero's OEM NeroExpress6
Nero's OEM NeroExpress6 appears to be a watered down 'lite' version of Nero's burning
program. It will allow you to create a bootable CD or DVD, but it will not
let you choose a 'boot image file' to create the bootable optical
media. It has a 'built-in' boot image file that the program calls (or
uses) when running the 'Data|Bootable Data Disc' routine. If you have a
floppy drive, it will allow you to use a floppy disk with boot information
to be used to create the bootable CD or DVD
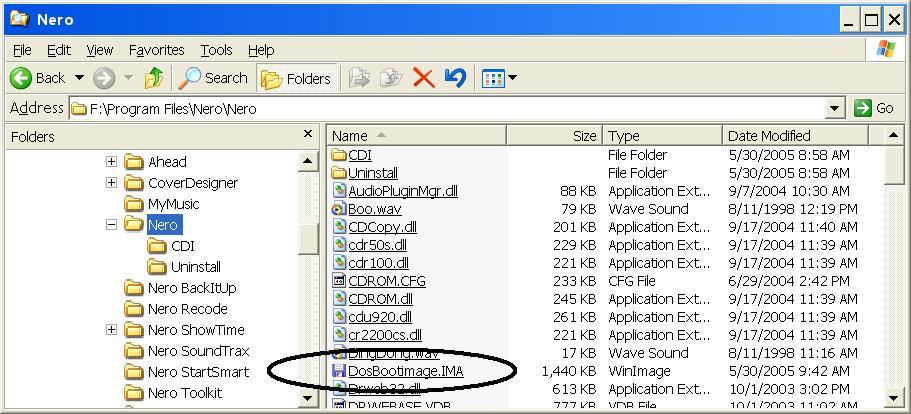
It turns out that the boot image file is named
'DosBootimage.ima'.Ā It is in the 'Nero' subdirectory (screen shot).
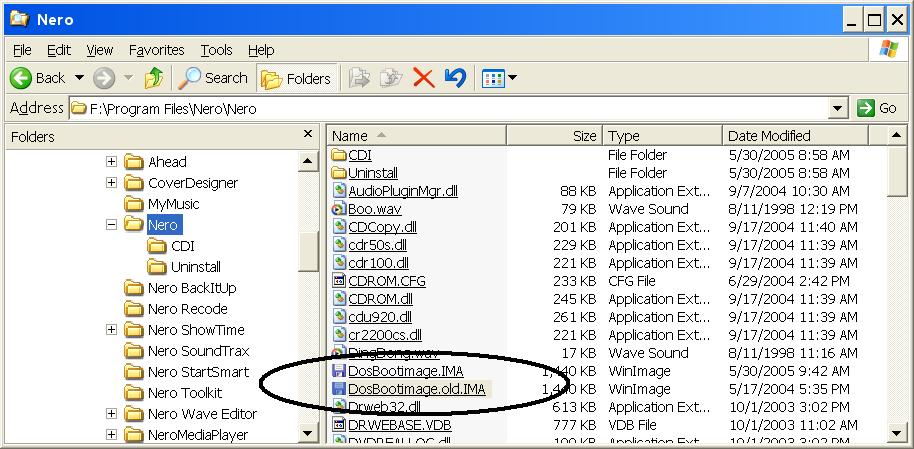
I experimented and found that I could re-name the original Nero
file to 'DosBootimage.old.ima'Ā(so I couldĀkeep
it for future use, if needed, by re-naming it back to it's original name).
I placed a copy ofĀmy boot image file (bootcdp1.ima
)Āin the 'Nero' subdirectory along with Nero's re-named
'DOSBootimage.old.ima' file.Ā I then renamed
my boot image file (bootcdp1.ima) to
'DosBootimage.ima' .ĀĀ So, it looks like this now--screen shot.Ā
Now, when I ran the 'Data|Bootable Data Disc' routine, the
NeroExpress6 program used my boot image and successfully created a
bootable CD with my boot files!
(There was a 'non-critical error' when initiating the 'burn'
saying that the Nero program was not able to open 'DosBootimage.ima--that
it was in use by another process--and asking if I wished to continue--I
selected 'Yes', and the boot image file was successfully added to
the optical disc which booted just fine!)
So here's the outline of the steps for NeroExpress6 (v6.3.1.25):
- Re-name the NeroĀfile 'DosBootimage.ima' to
'DosBootimage.old.ima'.Ā
Copy 'bootcdp1.ima' from 'C:\Bootable CD
Project\Boot Image' subdirectory, and pasteĀthe copy to the Nero
subdirectory as outlined above.Ā
Then re-name the 'bootcdp1.ima' to
'DosBootimage.ima' .Ā
- Launch NeroExpress
- From the opening Menu page, select 'Data|Bootable Data
Disc' from the 'What would you like to burn?' menu list.
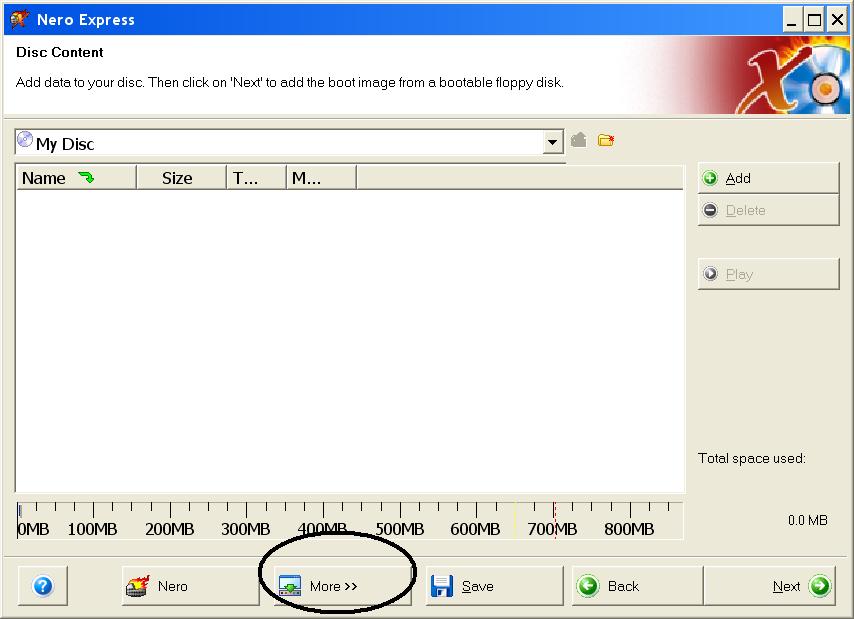
The next screen, (Disc Content), gives you the option to
select data to be burned to the disc. For this bootable CD project, skip
adding any files to the data portion of the disc--the burn will be much
quicker.
Click the 'More >>' button at the
bottom, and I selected 'Use the date and time from the original
file.'ĀSee Screen Shot here: and See 'More' optionsĀScreen Shot here:
Click 'Next'.
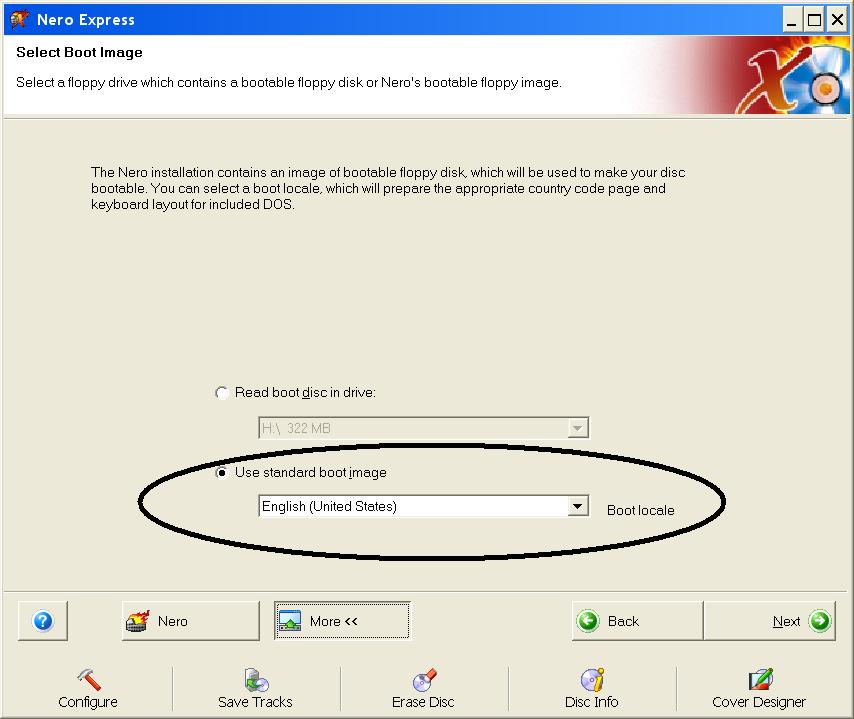
- You are now at the 'Select Boot Image' dialog screen. This is where
you find out you do not have the option of selecting any boot image file
of your choosing. You only have the option of:
- read a floppy boot disk, or
- use the built-in 'Nero's bootable floppy image.'
The built-in 'Nero's bootable floppy image' will now be our
custom boot image file that we created with WinImage and have re-named
to 'DOSBootimage.ima' at the beginning of this outline. So:
Select 'Use standard boot image'
Select 'English (United State)' for 'Boot Locale'.Ā Screen Shot here: Ā
Click 'Next'.
- You are now at 'Final Burn Settings' dialog page.
Select your optical recorder if not selected by default.
Type in a 'Disc Name'--I used 'Ghost Boot
CD' .
Select Write Speed.
I checked 'Verify data on disc after burning'.
Select theĀ'More >> '
button.Ā
Select Write Method--'Track-at-once'.
Check only 'Write' .
Click 'Burn' (Recommend using
re-writeable disc while testing.)
Screen Shot here:
This is where I got the 'non-critical' error message and
elected to continue, but the disk was burned successfully.
- Return to Step #12, Page 3 on the 'Step-by-Step Instruction' page Āand test your bootable
CD.
